Sponsored
- 📚 Learn to design and build efficient web applications with ASP.NET Core MVC, creating well-structured, maintainable code that follows industry best practices with Real-World Web Development with .NET 9 by Mark Price. Start here!
- I launched my YouTube channel and built The CodeMan Community - your hub for .NET content, mini-courses, and expert advice! The first 100 members get in for just $4/month! 🚀 Join now and grab my first ebook for free: - Join now
Many thanks to the sponsors who make it possible for this newsletter to be free for readers.
Want to reach thousands of .NET developers? Sponsor TheCodeMan →
The Problem: A Real-World Story
Imagine a growing .NET team working on a cloud-native application. They need to test their microservices across multiple environments - development, test, and production. Every environment requires a fresh database instance, and every test run demands a reset. Sounds reasonable, right? But here’s the problem: Database creation takes time, even in cloud-native solutions. Setting up, tearing down, and managing multiple databases slows down iteration speed, especially when dealing with integration tests. What if you could have an instant, isolated database for each environment without the overhead? The Problem with Traditional Approaches:
- Spinning up multiple Postgres instances is slow and inefficient.
- Running full migrations per environment adds unnecessary complexity.
- Cleaning up databases between test runs can be a bottleneck.
- Managing connection strings and secrets across environments is error-prone.
So what I found useful here is Neon serverless Postgres in combination with Aspire. It's really interesting implementation, so let's dive in!
The Initial Project Setup
We have a .NET 9 Api project that works with Blog Posts.
public class BlogPost{ public int Id { get; set; } public string Title { get; set; } = string.Empty; public string Content { get; set; } = string.Empty;}
I also created a simple DbContext with the only DbSet I had already defined.
public class BlogDbContext : DbContext{ public BlogDbContext(DbContextOptions<BlogDbContext> options) : base(options) { } public DbSet<BlogPost> BlogPosts => Set<BlogPost>();}
Also, I created Minimal APIs with basic CRUD operations on Blog posts.
app.MapGet("/api/blog", async (BlogService blogService) => await blogService.GetAllPostsAsync()); app.MapGet("/api/blog/{id:int}", async (int id, BlogService blogService) =>{ var post = await blogService.GetPostByIdAsync(id); return post is null ? Results.NotFound() : Results.Ok(post);}); app.MapPost("/api/blog", async (BlogPost post, BlogService blogService) =>{ var createdPost = await blogService.AddPostAsync(post); return Results.Created($"/api/blog/{createdPost.Id}", createdPost);}); app.MapDelete("/api/blog/{id:int}", async (int id, BlogService blogService) =>{ return await blogService.DeletePostAsync(id) ? Results.NoContent() : Results.NotFound();});
As for databases, I mentioned that I will use PostgreSQL since it is currently one of the most used databases.
Use Case
Let's say we have a production database on which we want to test the code we are currently working. Before deploying to production, we would have an identical environment with a database that we can change for testing purposes, for example test. We could also debug the application over the data that is in the production database - development.
But we all know one rule here - no touching the production database.
So all we have to do is clone the database, put it on the server and test it.
This is a very tedious process that can take a long time, depending on the size of the database.
What would you say if I told you that you can make a copy in 10s?
Let me show you!
Neon with Branches
Neon is a serverless Postgres database designed for modern cloud applications.
Unlike traditional PostgreSQL hosting solutions, Neon provides instant branching, autoscaling, and pay-per-use pricing, making it ideal for testing, development, and dynamic workloads.
Neon allows branch-based databases, which means each test environment can get an instant, isolated database without waiting for full provisioning.
Aspire, Microsoft's new cloud-native composition framework, simplifies environment setup by orchestrating dependencies like databases in a streamlined way. By combining Neon’s branching feature with Aspire’s service orchestration, we can dynamically provision databases per environment and even automate cleanup.
The first thing that is necessary is to go to Neon and register and create your first database - you need less than 2 minutes (if you spend more time, contact me, you get a free ebook :D)
When you do that, a Dashboard like this will be waiting for you:
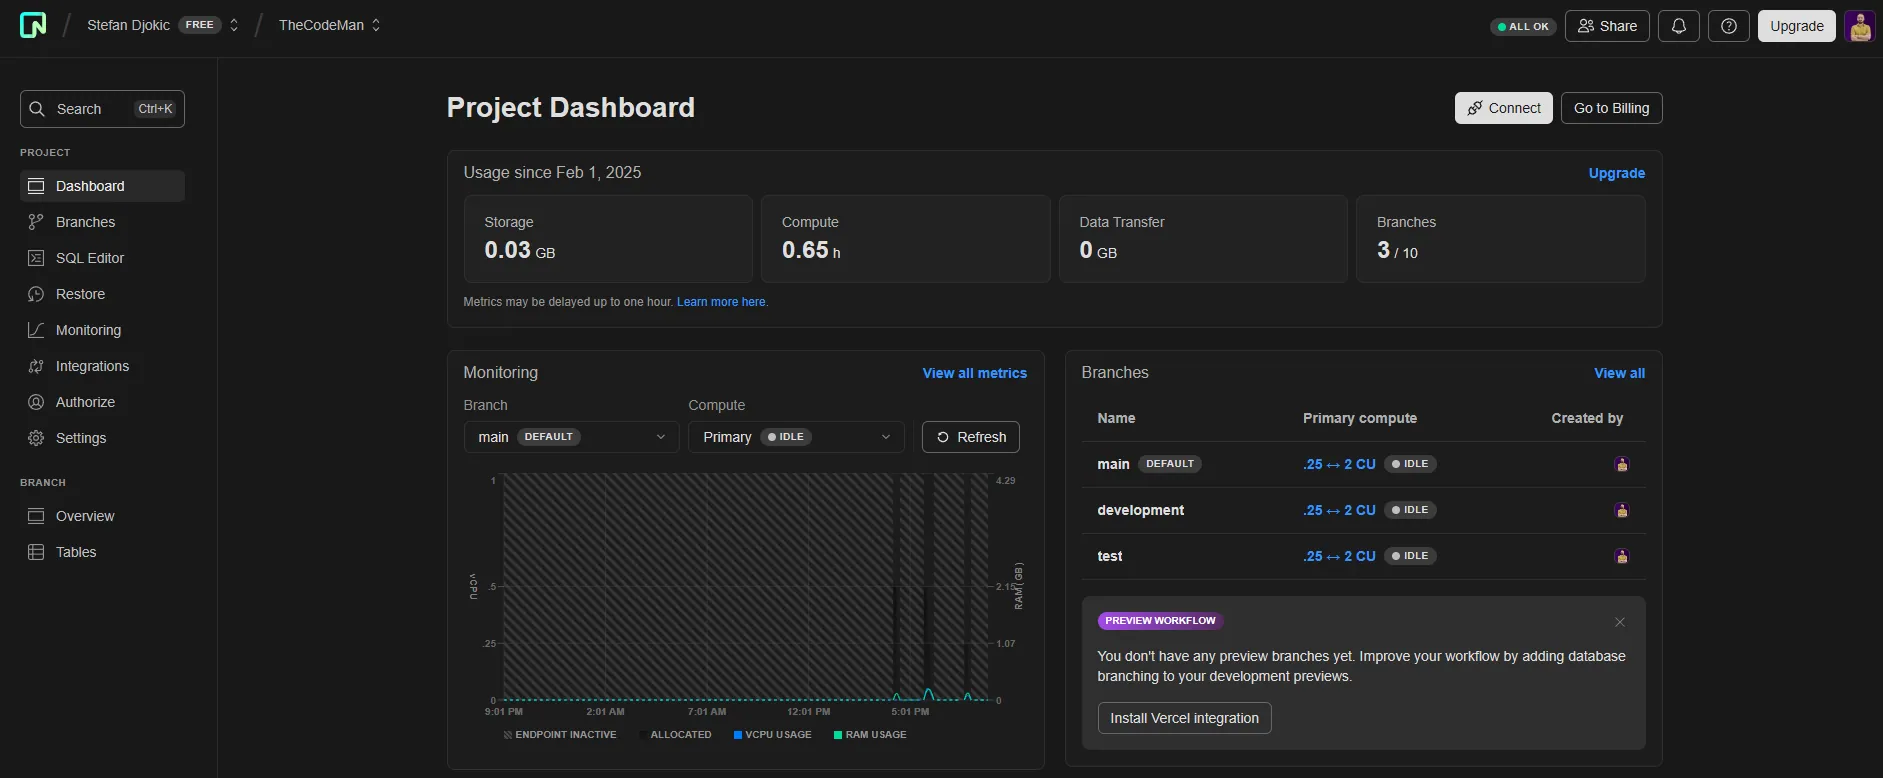 On the dashboard, you can see how much and how the database is being used, you have complete monitoring for each component (Storage and CPU are separated with Neon), and on the right side you can see the branches that will be discussed.
I added these other 2, you won't see them at the beginning. And I will explain to you what it is for.
On the dashboard, you can see how much and how the database is being used, you have complete monitoring for each component (Storage and CPU are separated with Neon), and on the right side you can see the branches that will be discussed.
I added these other 2, you won't see them at the beginning. And I will explain to you what it is for.
By default we have a "main" branch base as in Git code. Let this serve as our "Production" database.
And now we first need to debug our application with the production database.
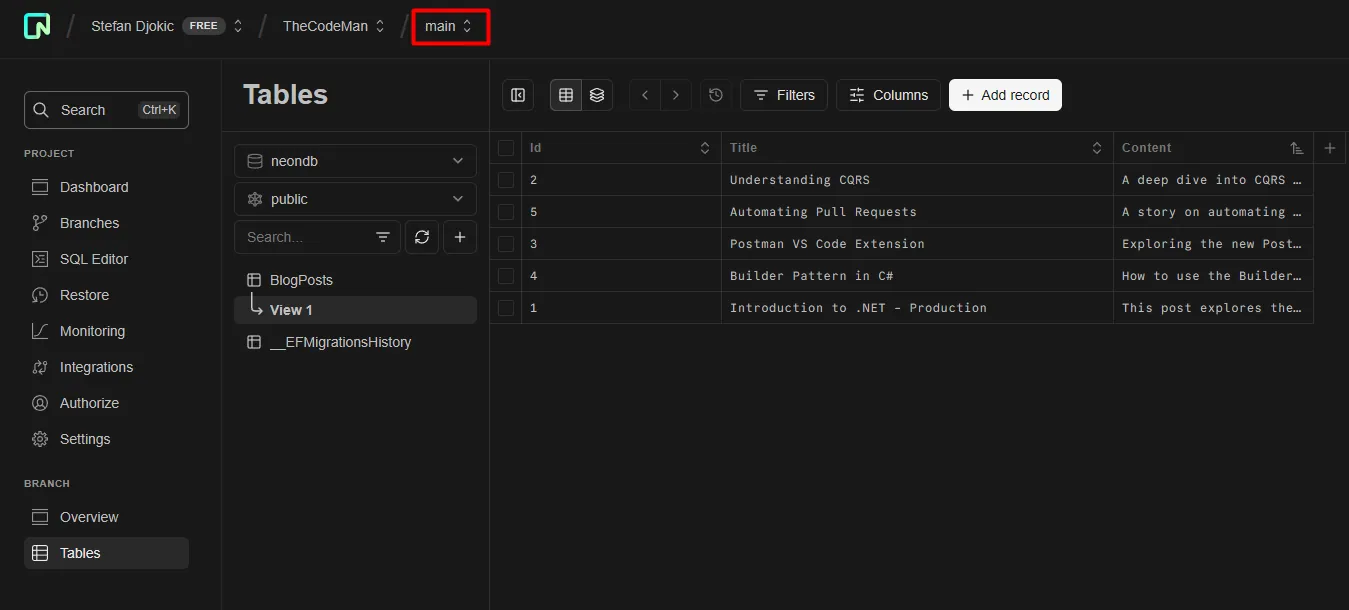
We have only one table with a couple of rows, we can see that by clicking on "Tables" from the menu on the left.
Neon allows us to do this in seconds.
Neon allows you to create a new branch from an existing one and thus copy the entire database to the new branch.
Creating a branch looks like this:
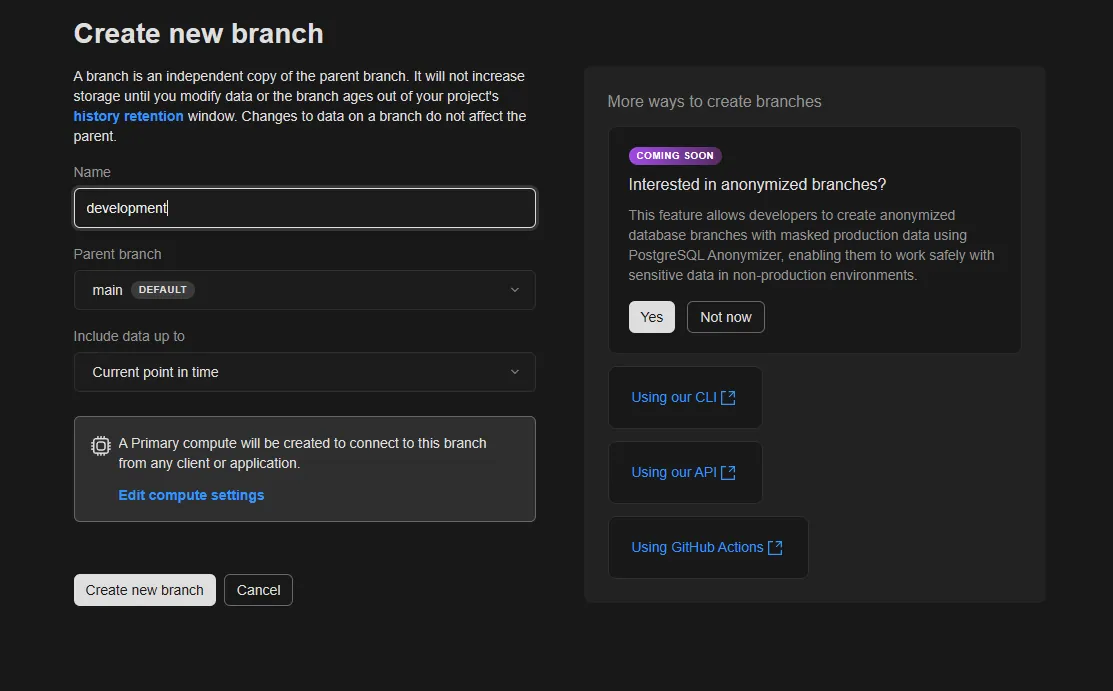
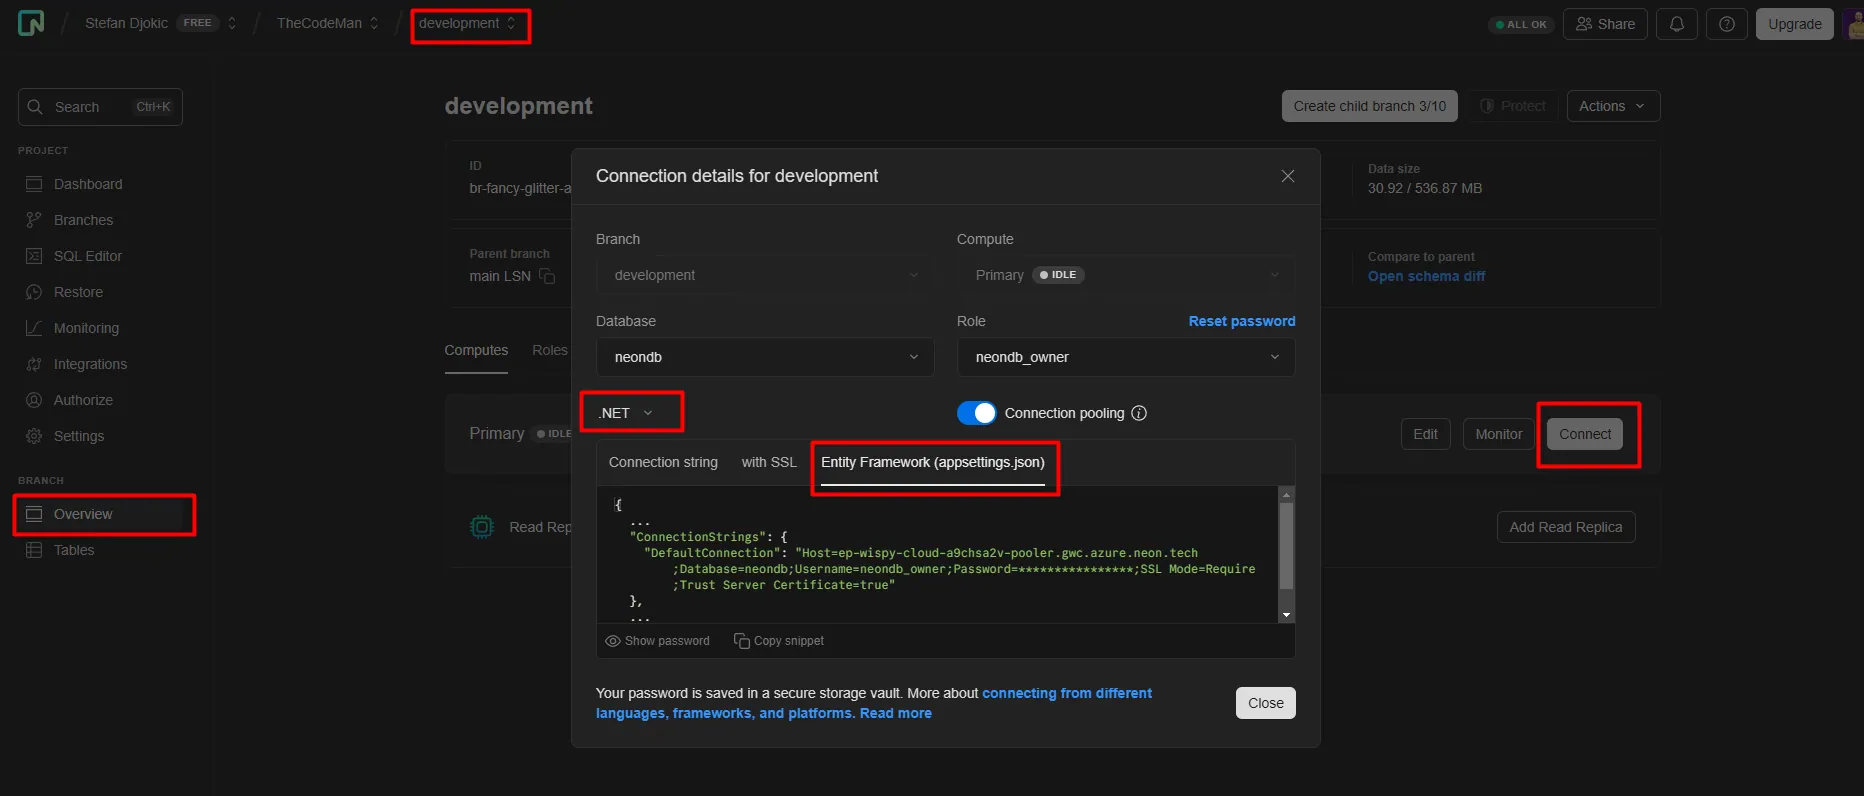
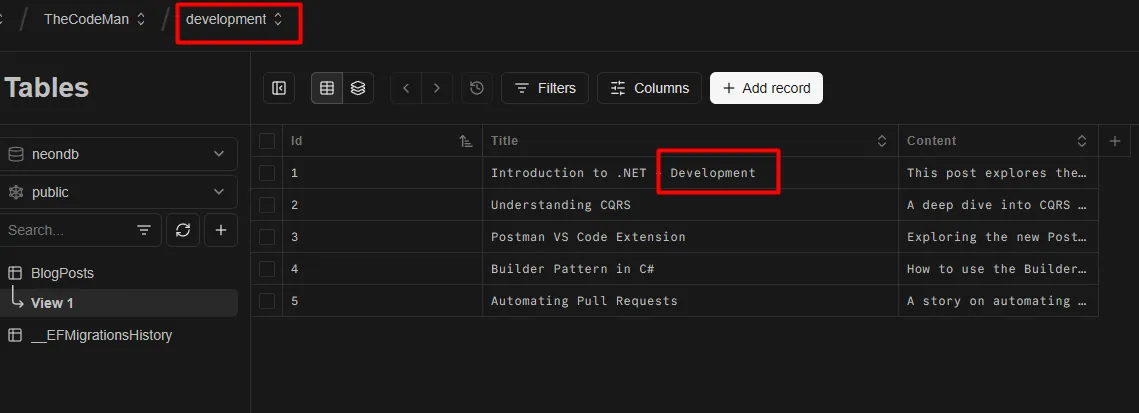
We have a newly created branch with the same data (I changed the name of the book to Development to make it different).
And this branch can be used as a completely separate instance of the database in our connectionString.
Connection string, for various platforms, you can see when you go to Overview branch, then Connect.
We will use .NET for EntityFramework.
BlogPosts table:
Excellent!
We have the database set up for Debug in Development.
We need another database identical to the production database in order to test the application before deployment to the live environment.
We will repeat the same process for the Test branch.
Let's see what we will do with the code!
Introducing Aspire
Aspire is Microsoft’s new cloud-native application model for .NET, designed to make microservices, distributed applications, and cloud-native development easier.
It provides an opinionated, pre-configured stack for handling service discovery, observability, environment configurations, and local development in a .NET-friendly way.
Today, Aspire will help us create a good basis for testing multiple environments with different settings, dynamically.
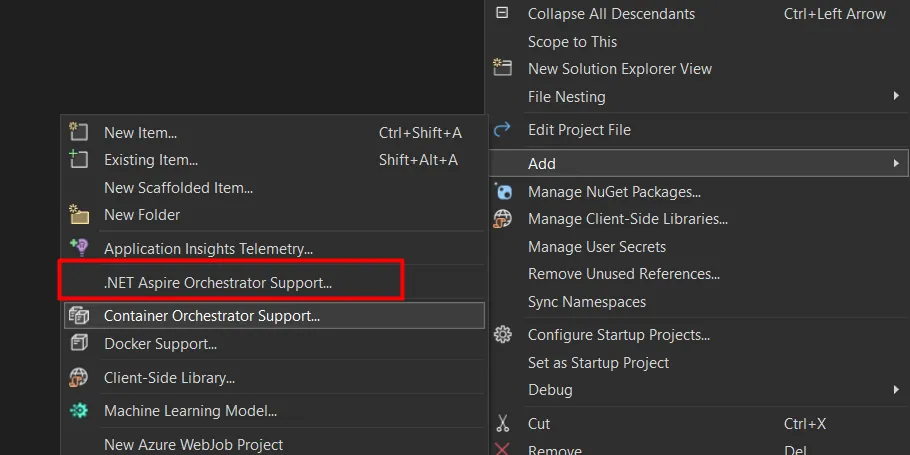
In order to add Aspire Orchestrator to your existing project, you just need to add it from the right-click menu on the API project:
Setting up all environments
Given that we have 3 different environments: Production, Development and Test, we will add 3 connectionStrings in the Aspire project appsettings.json file (Blog.AppHost):
"ConnectionStrings": { "Development": "COPY_YOUR_DEVELOPMENT_CONNECTION_STRING", "Test": "COPY_YOUR_TEST_CONNECTION_STRING", "Production": "COPY_YOUR_PRODUCTION_CONNECTION_STRING"}
After that, we will set that in relation to the current environment (which we can change in the launchsettings.json file), a certain connectionString is taken from the configuration file and sent to the API, which we also register within Aspire.
var builder = DistributedApplication.CreateBuilder(args); var environment = builder.Environment.EnvironmentName; var connectionString = builder.AddConnectionString(environment); builder.AddProject<Projects.Blog_Api>("blog-api") .WithReference(connectionString); builder.Build().Run();
Summary:
- Loads the correct environment (Development, Staging, etc.).
- Retrieves an environment-specific database connection string.
- Registers the blog-api service and links it to the correct database. This enabled Aspire to extract the necessary connectionString and pass it to the API based on the current environment. In order for APi to know how to process this, it is necessary to configure Program.cs.
var env = builder.Environment.EnvironmentName; var connectionString = builder.Configuration.GetConnectionString(env); builder.Services.AddDbContext<BlogDbContext>(options => options.UseNpgsql(connectionString)); builder.Services.AddScoped<BlogService>();
Testing
By default, the environment is Development. We will launch the AppHost Aspire project.
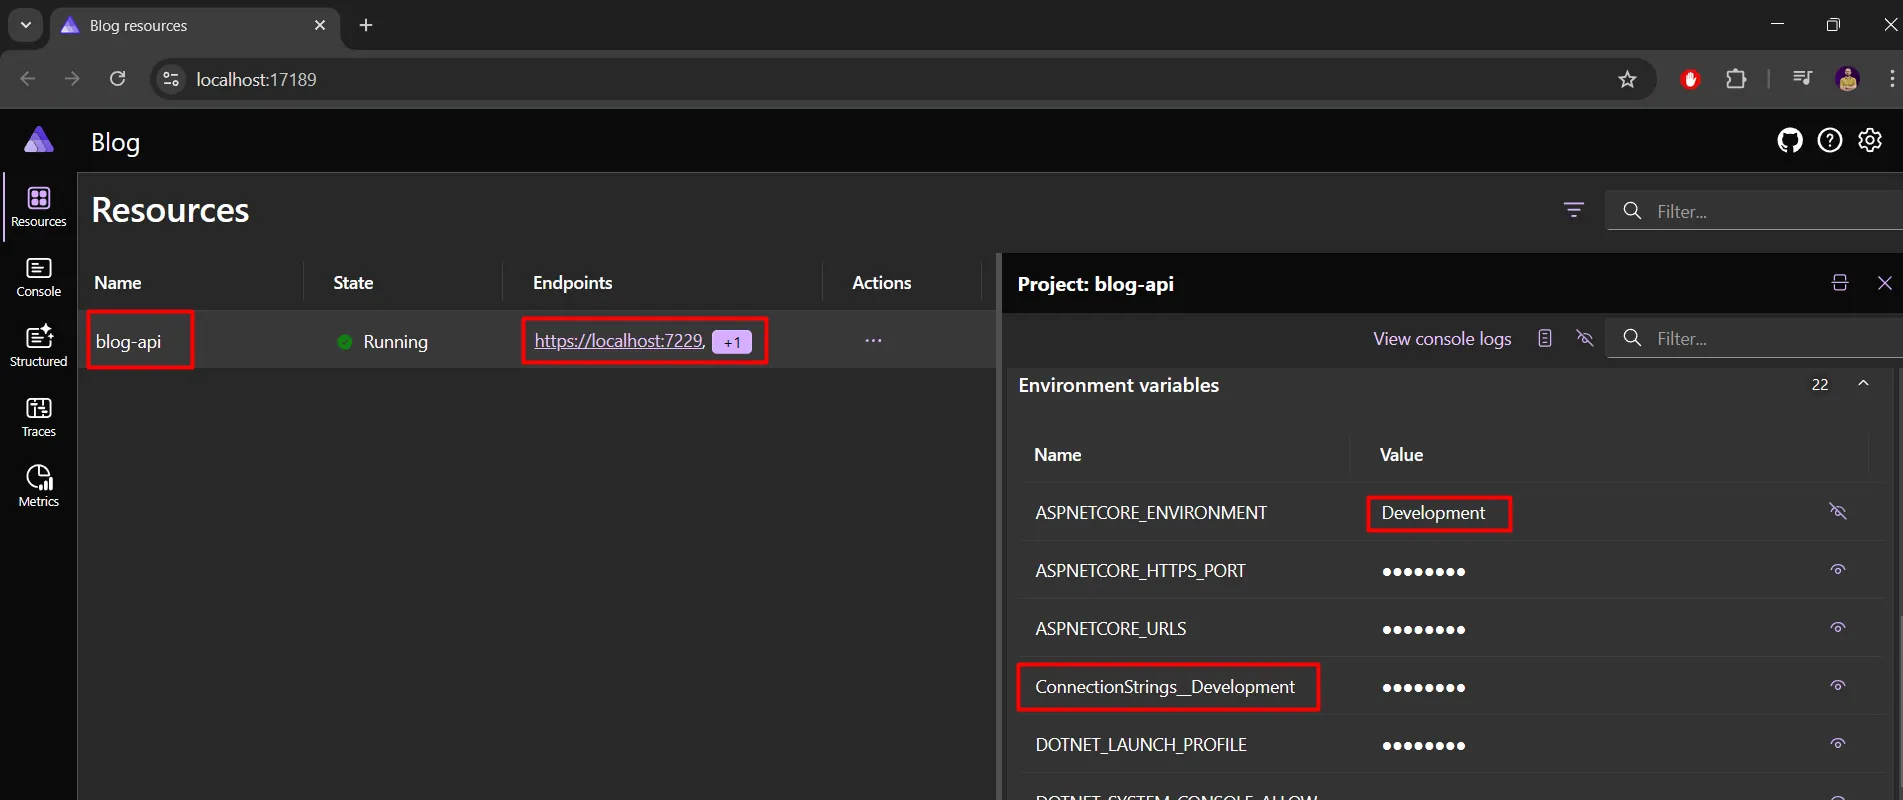
Here we can see that ASPNETCORE_ENVIRONMENT=Development, and we can also see that the ConnectionString is for Development.
The API runs on port 7229, so let's call the endpoint and see if we can get data from the branch we're targeting.

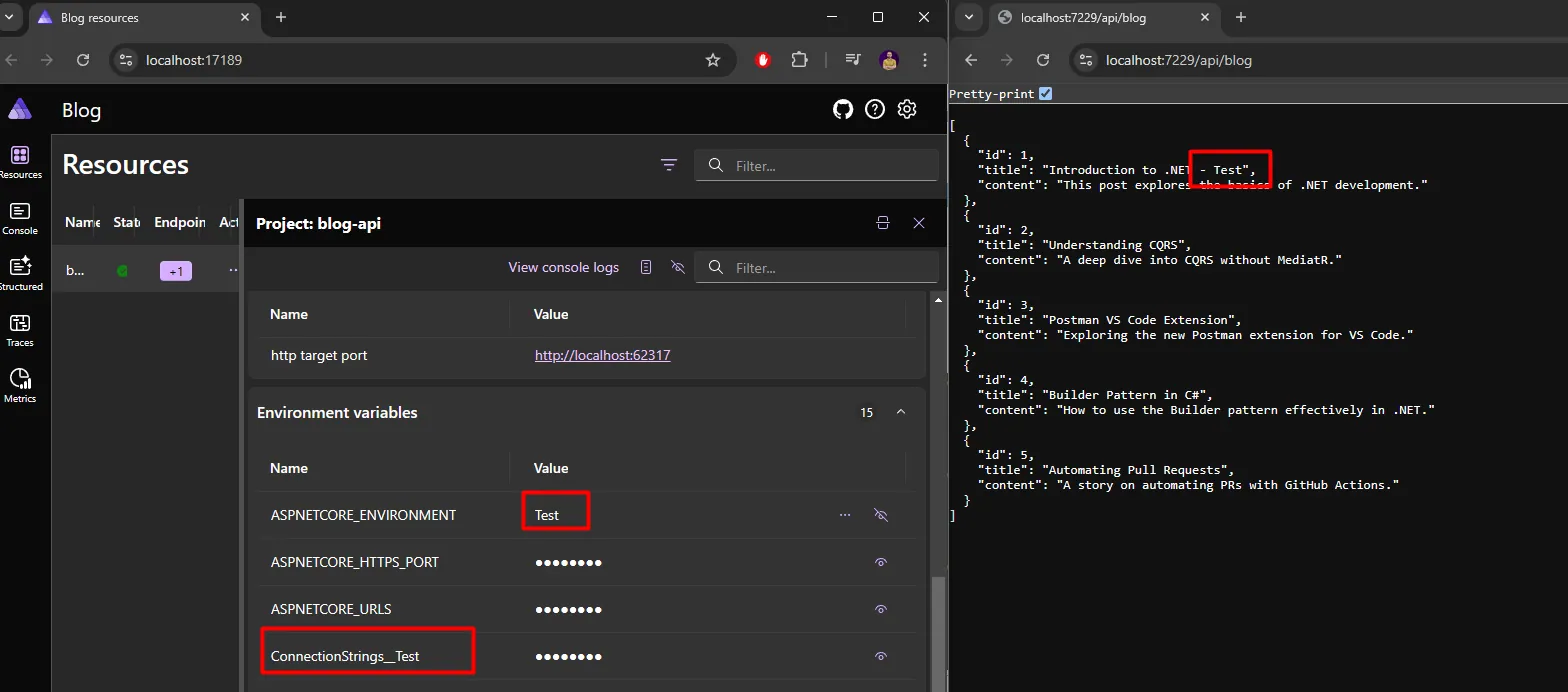
Awesome! And now if we would like to change the environment for which we run the application, it is necessary to change it in launchSettings.json, e.g. from Development, to Test.
When we do this, we get the result:
What's the point?
Wrapping Up
The point of this Newsletter is to show that you don't have to waste days and hours on setting up and making copies of the database, also that the cost doesn't have to be so high and that the performance of the server doesn't depend on how many databases you have created.
It can be done in a very simple way in just 2 clicks.
And that way, we can actually focus on what our job is - programming.
Also, we passed the short configuration of Aspire purely to give the option to expand this system. Caching, OpenTelemetry or anything else could be added here.
The complete code can be found in the GitHub Repository.
That's all from me today.
P.S. Follow me on YouTube.