Jobs in .NET with Hangfire
Apr 17 2023
What is Hangfire and how it's working?
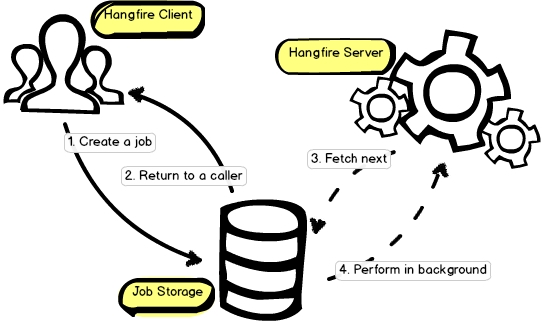
There are 3 main components of Hangfire architecture:
1. Client
This is the code in your application that enqueues background jobs and schedules them to run at a specific time or on a recurring basis. The client API provides a simple way to create and manage background jobs from within your code.
2. Server
This is a background process that runs continuously and is responsible for executing scheduled and queued jobs. It listens to the job storage and picks up new jobs as they become available.
3. Storage
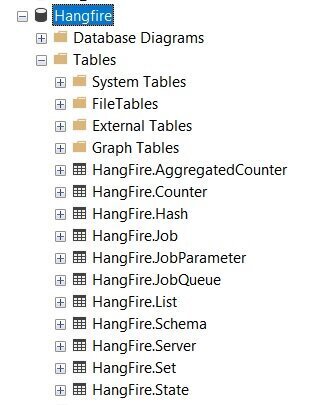
Hangfire provides a database to store all the information related to background jobs, including their definitions, execution status, and more. Hangfire creates a couple of designated tables in the database to manage this information.
By default, it uses SQL Server, but any other supported option is also easy to configure.
Here is the Hangfire workflow.

Setting up Hangfire
NuGet Package:
You need to install Hangfire package.

The last version is 1.7.34.
Hangfire.SqlServer and Hangfire.Core are installed by default.
Setup Storage:
Hangfire has the ability to use a SQL Server database by default for storing job definitions and statuses. Additionally, you have the option to choose other alternatives. For our example project, I have decided to use MSSQL local storage for simplicity.
It is essential to have a database definition, regardless of whether you use a local or remote database. Hangfire is capable of creating the necessary tables for job storage, but it cannot create a database. Therefore, you must provide a database.
Once you have set up our local database, you must update the appsettings.json file:
"ConnectionStrings": { "DefaultConnection": "Server=localhost;Database=Hangfire;Trusted_Connection=True" }
Program.cs setup:
You need to add Hangfire to Services collection.
You need to provide the connection string that you specified inside the appsettings.json file.
builder.Services.AddHangfire(x => { x.UseSqlServerStorage(builder.Configuration .GetConnectionString("DefaultConnection")); })
You also add the Hangfire server with the AddHangfireServer() method.
builder.Services.AddHangfireServer();
Lastly, you can add Hangfire Dashboard for easily monitoring servers and jobs.By calling the UseHangfireDashboard() method you are adding it to popeline.
app.UseHangfireDashboard();
DI registration:
builder.Services.AddHostedService<SomeService>();
Running the application
Persistence:
Hangfire will automatically check your storage for the necessary tables, and if they don’t exist, it will create them for you:

Hangfire Dashboard:
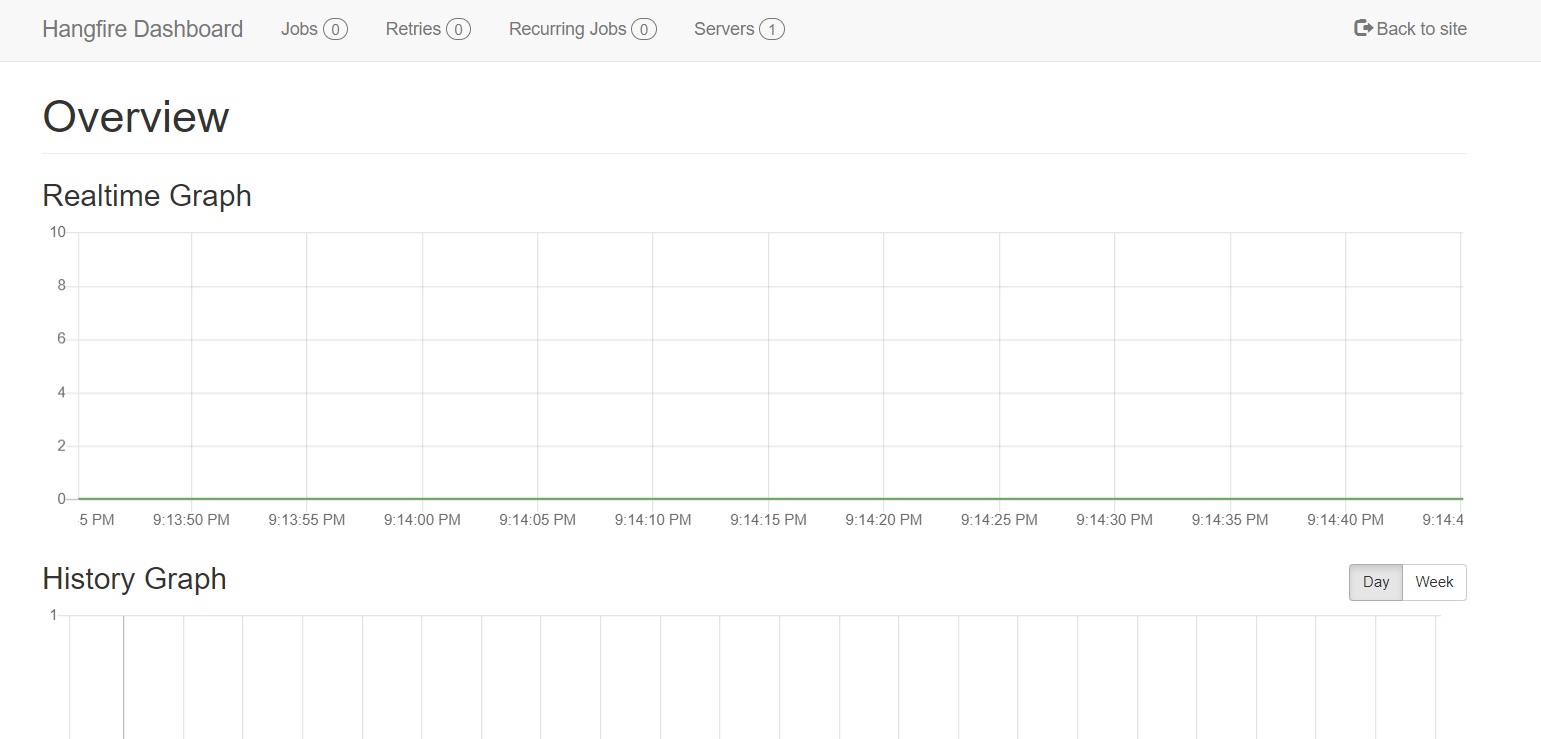
This is a web-based UI that allows you to monitor the state of your background jobs. You can use the dashboard to view the status of jobs, retry failed jobs, and cancel running jobs if necessary. To check the dashboard you need to land on /hangfire page.

Background jobs
There are several types of background jobs that you can perform using Hangfire:
- Fire-and-forget:
These are jobs that are executed once and then forgotten. They are used for tasks that need to be performed in the background, but the result doesn't need to be returned to the application immediately.
- Delayed jobs:
These are jobs that are scheduled to run at a specific time in the future. You can use them to schedule tasks that need to be performed at a specific time, such as sending a reminder email to a user.
- Recurring jobs:
These are jobs that are scheduled to run repeatedly at a specified interval. You can use them to automate tasks that need to be performed on a regular basis, such as generating reports or performing database cleanup.
- Continuations:
These are jobs that are executed after a previous job has completed. You can use them to create a sequence of jobs that need to be performed in a specific order.
- Batch jobs:
These are jobs that are grouped together and executed as a single unit. You can use them to perform a set of related tasks that need to be executed together.
Let' take a look on the example:
public interface IJobsService { void FireAndForgetJob(); void DelayedJob(); void ReccuringJob(); void Continuation(); void BatchJob(); }
Executing jobs
Fire and Forget jobs
We need to inject IBackgroundJobClient in order do call the job with Enqueue.
Enqueueing a job means that you are adding it to a queue of jobs that are waiting to be processed. When a job is enqueued, it is not executed immediately but instead is stored in a persistent storage (usually a database) until a worker process is available to process it.
In order to test, you can create an endpoint:
[HttpGet("FireAndForgetJob")] public ActionResult CreateFireAndForgetJob() { _jobClient.Enqueue(() => _jobsService.FireAndForgetJob()); return Ok(); }
Delayed jobs
The Schedule method in the IBackgroundJobClient interface of the Hangfire library is used to schedule a job to run at a specific time in the future.
When you schedule a job using the Schedule method, you are specifying a delay or a specific date and time for the job to run. The job is added to a persistent storage (usually a database) and is executed automatically when the specified time is reached.
Let's create another endpoint:
[HttpGet("DelayedJob")] public ActionResult CreateDelayedJob() { _jobClient.Schedule(() => _jobsService.DelayedJob(), TimeSpan.FromSeconds(60)); return Ok(); }
Continuation jobs
In other words, when you create a continuation job, you're saying "once this other job is done, then run this one." This can be useful for creating complex workflows where certain jobs need to run in a specific order, or where one job needs to finish before another can begin.
To create a continuation job in Hangfire, you first need to create the parent job using one of the library's scheduling methods, such as Enqueue or Schedule. Then, you can use the Continuations API to create the dependent job that will run after the parent job is finished.
Let's create another endpoint:
[HttpGet("ContinuationJob")] public ActionResult CreateContinuationJob() { var parentJobId = _jobClient.Enqueue(() => _jobsService.FireAndForgetJob()); _jobClient.ContinueJobWith(parentJobId, () => _jobsService.Continuation()); return Ok(); }
Reccuring jobs
To schedule this job you will need a different Hangfire interface. You need to inject IRecurringJobManager.
A recurring job is a task that needs to be performed repeatedly on a schedule. For example, sending a weekly email newsletter, or performing a daily database backup.
Using Hangfire's AddOrUpdate method, you can define the schedule for a recurring job using a cron expression, which is a string that specifies the frequency and timing of the job.
Here's how the AddOrUpdate method works: you first need to specify a unique identifier for the job, which will be used to identify it later. Then, you provide a lambda expression that defines the method to be executed as the job. Finally, you specify the cron expression that defines the job's schedule.
Let's create another endpoint:
[HttpGet("ReccuringJob")] public ActionResult CreateReccuringJob() { _recurringJobManager.AddOrUpdate("jobId", () => _jobsService.ReccuringJob(), Cron.Daily); return Ok(); }
Batch jobs (pro only)
Batches allow you to create a bunch of background jobs atomically. This means that if there was an exception during the creation of background jobs, none of them will be processed.
var batchId = BatchJob.StartNew(x => { x.Enqueue(() => Console.WriteLine("Job 1")); x.Enqueue(() => Console.WriteLine("Job 2")); })
That's all from me today.
Make a coffee and check the whole project on GitHub repository.
About the Author
Stefan Djokic is a Microsoft MVP and senior .NET engineer with extensive experience designing enterprise-grade systems and teaching architectural best practices.
There are 3 ways I can help you:
My Design Patterns Ebooks
1. Design Patterns that Deliver
This isn’t just another design patterns book. Dive into real-world examples and practical solutions to real problems in real applications.Check out it here.
Go-to resource for understanding the core concepts of design patterns without the overwhelming complexity. In this concise and affordable ebook, I've distilled the essence of design patterns into an easy-to-digest format. It is a Beginner level. Check out it here.
Join TheCodeMan.net Newsletter
Every Monday morning, I share 1 actionable tip on C#, .NET & Arcitecture topic, that you can use right away.
Join 18,000+ subscribers to improve your .NET Knowledge.
Subscribe to
TheCodeMan.net
Subscribe to the TheCodeMan.net and be among the 18,000+ subscribers gaining practical tips and resources to enhance your .NET expertise.