Sponsored
- Treblle Api Insights Treblle has come out with a revolutionary new tool - API Insights. If until now you couldn't tell on the scale how good your API is, now you will be able to. It's a free tool, you only need to upload your .json of the API you're building and you'll get insights on how good your API is in 3 categories: Design, Performance, Security. Check your API here.
Many thanks to the sponsors who make it possible for this newsletter to be free for readers.
Want to reach thousands of .NET developers? Sponsor TheCodeMan →
The Background
A project workflow is like a roadmap that guides you from the very beginning of a project all the way to its successful completion. It's essentially a series of well-defined steps and processes that you and your team follow to make sure everything gets done correctly and on time. Think of it as a recipe for success, tailored to the unique needs of your project. Imagine you're building a house. The workflow for that project would include steps like designing the blueprints, getting the necessary permits, laying the foundation, framing the structure, and so on. Each of these steps has its own set of tasks and dependencies. But compare that to a software development project. Here, your workflow might start with requirements gathering, move on to coding, testing, and finally, deployment. These steps are very different from building a house but are equally important to ensure a successful outcome. I've seen people create workflows in various tools, and even in Paint. Today I will show you how I create a workflow in my .NET application.
My Newsletter Workflow Example
I will show everything on a simple example of my newsletter, so that it is easier to understand. Let me first explain the workflow newsletter process. Here's an example of a newsletter workflow from the point a user subscribes to my newsletter to the point I send out a newsletter issue:

How do I implement this in .NET?
Have you heard of Workflow Engine? Workflow Engine is the perfect solution if you are dealing with business entities life cycle management in a project. Using embedded drag&drop designer you can create processes in your system and manage your workflows via a simple API. The basic set of elements allows business users to modify workflow schemes themselves. You can integrate Workflow Engine as an embedded component or via REST API. Check out demo. Let's see how to integrate it in your .NET application.
.NET Web Application Integration
Before you continue reading:
- you can watch here video of full integration with .Net.
- you can check the project repository here.
### Steps:
- Setting up the database
- Initializing WorkflowRuntime
- Connecting the Designer ### 1. Setting up the database
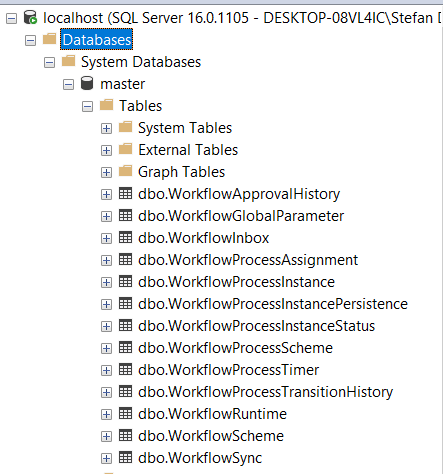
WorkflowEngine offers multiple Database Providers, from MSSQL, MongoDb, PostgreSQL, to Redis. I will use MSSQL database. You can create your database using SQL commands offered by the engine itself. On the following GitHub link, you can find CreatePersistenceObjects.sql, which you can execute on your database and with that you will create all the necessary tables. It looks like this:
2. Initializing WorkflowRuntime
WorkflowRuntime is a project that actually represents the communication between our application and WorkflowEngine.
- Create a Class Library project
- Add the following NuGet packages into your project
- WorkflowEngine.NETCore-Core
- WorkflowEngine.NETCore-ProviderForMSSQL
- Create a WorkflowInit.cs file and copy all the code from here.
- Build the project to make sure there are no errors.
WorkflowRuntime is ready. Now it is necessary to combine it with the designer that you will create yourself - I will show you how in the next step.
### 3. Connecting the Designer
What is WorkflowDesigner?
It is actually a web application identical to the demo project I showed above, in which you can create your own workflow.
WorkflowEngine helps you a lot here, because it gives you all the code you need to add to have a finished designer - in other words, you don't have to write anything yourself in this step.
On the localhost we create, the designer looks like this:
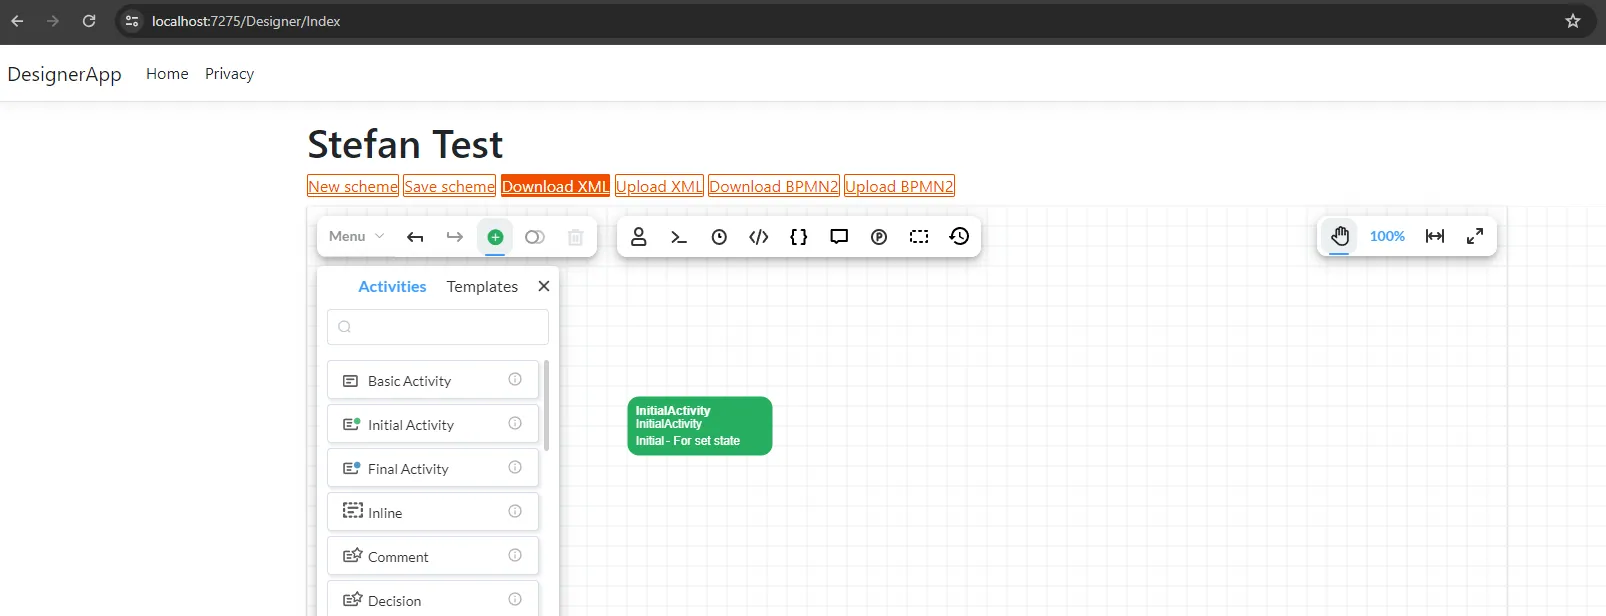
So that you don't waste time on these steps, and that the reading doesn't become boring, I have prepared it for you. It's on the GitHub repository I posted above. Of course, if you want to get into the depth of this implementation, you can look at the official documentation.
Okay, let's design our Newsletter Workflow!
For the simplicity of the blog and explanation, I will create a simple workflow with a few activities and commands.
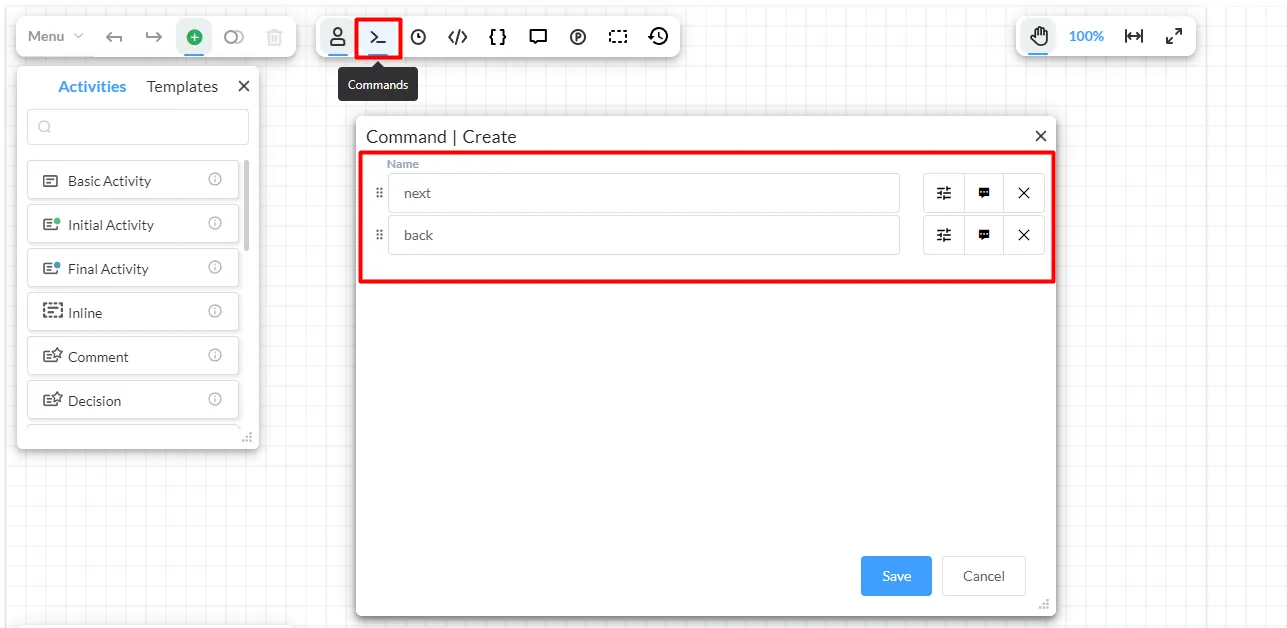
Let's create 2 commands : next and back . Commands serve to move from one activity (state) to another. Let's say when the user subscribes to the newsletter, the next activity would be to send a confirmation email.
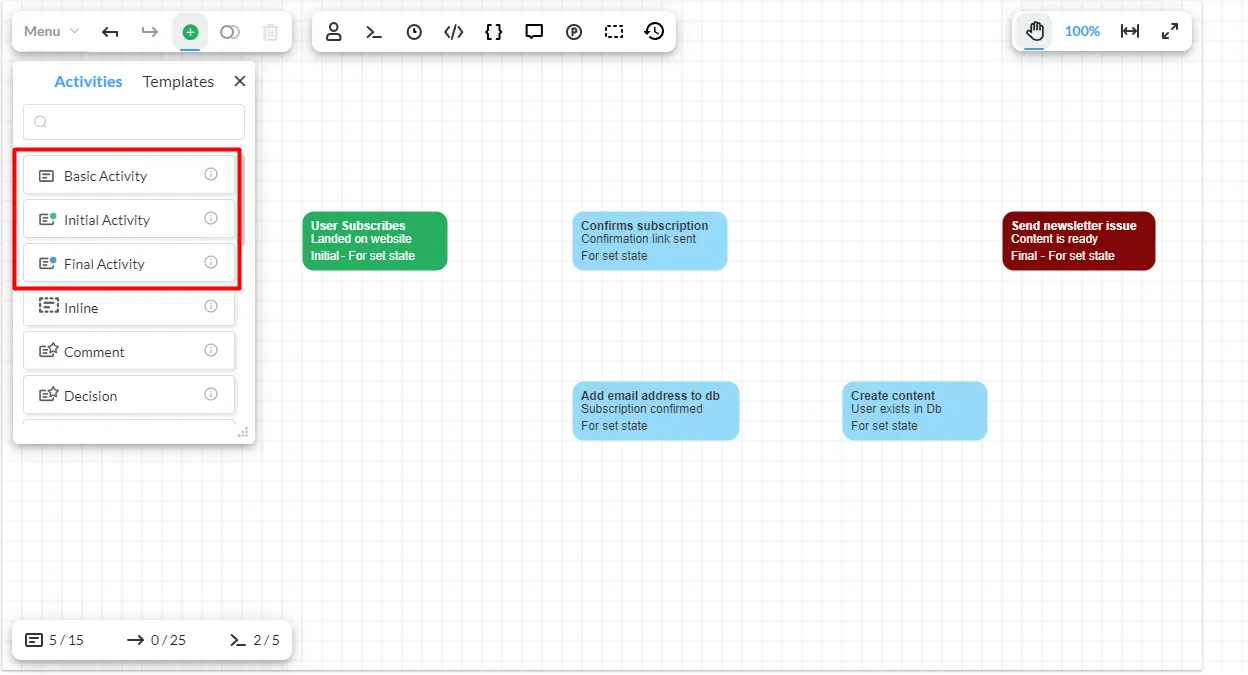
 Now create a couple of activities that happen in your process. I created a total of 5, where I have an initial (green color) and a final (red color), so I have 3 intermediate activities (blue color).
 Perfect!
In order to enable the transition from one activity to another by executing additional commands, it is necessary to do this through transitions. I created a transition for each transition from one state to another state.
Perfect!
In order to enable the transition from one activity to another by executing additional commands, it is necessary to do this through transitions. I created a transition for each transition from one state to another state.
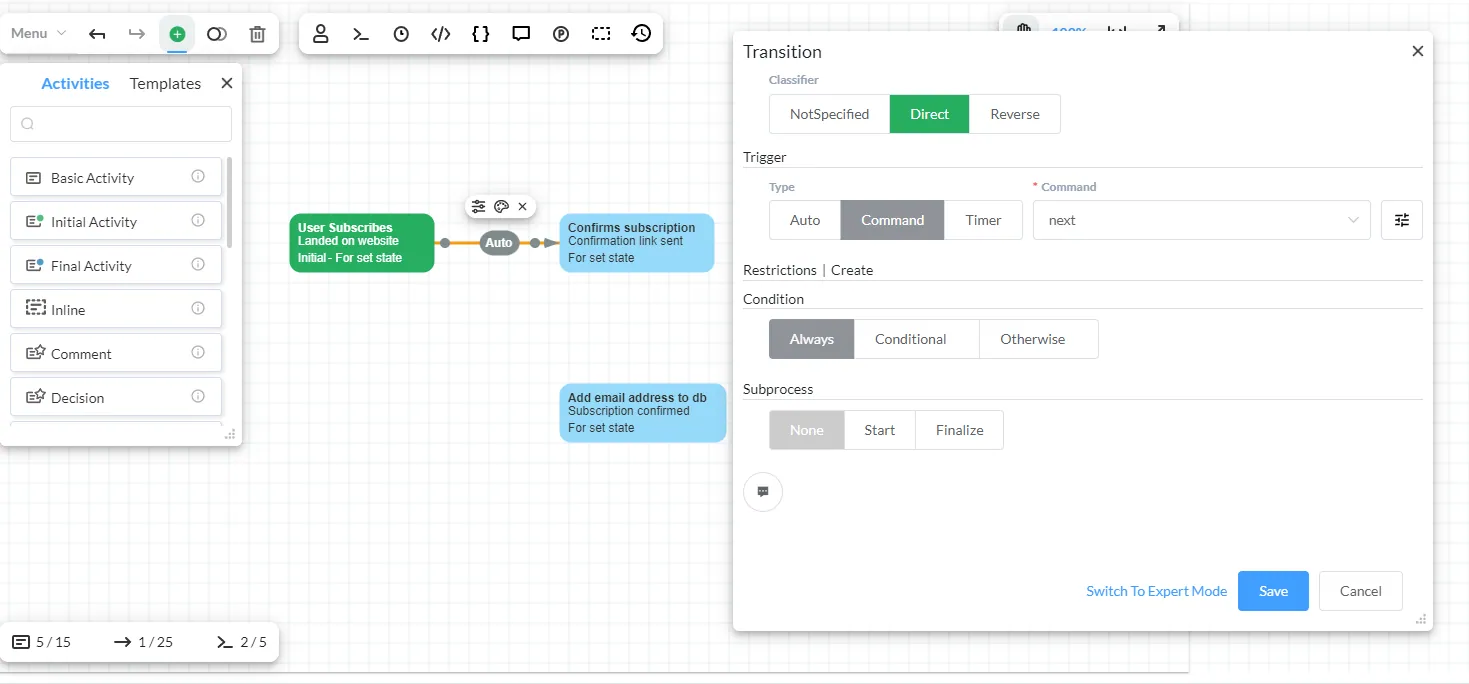 When creating transitions, you have the option to choose the type of transition ( direct and reverse ) that actually represents the direction in which the flow moves. What is important for us here is the Trigger , which will actually be the command I created - next. For reverses I have the back command. This is good if, for example, the user has not successfully verified the subscription, in that case we have to go back to the previous activity.
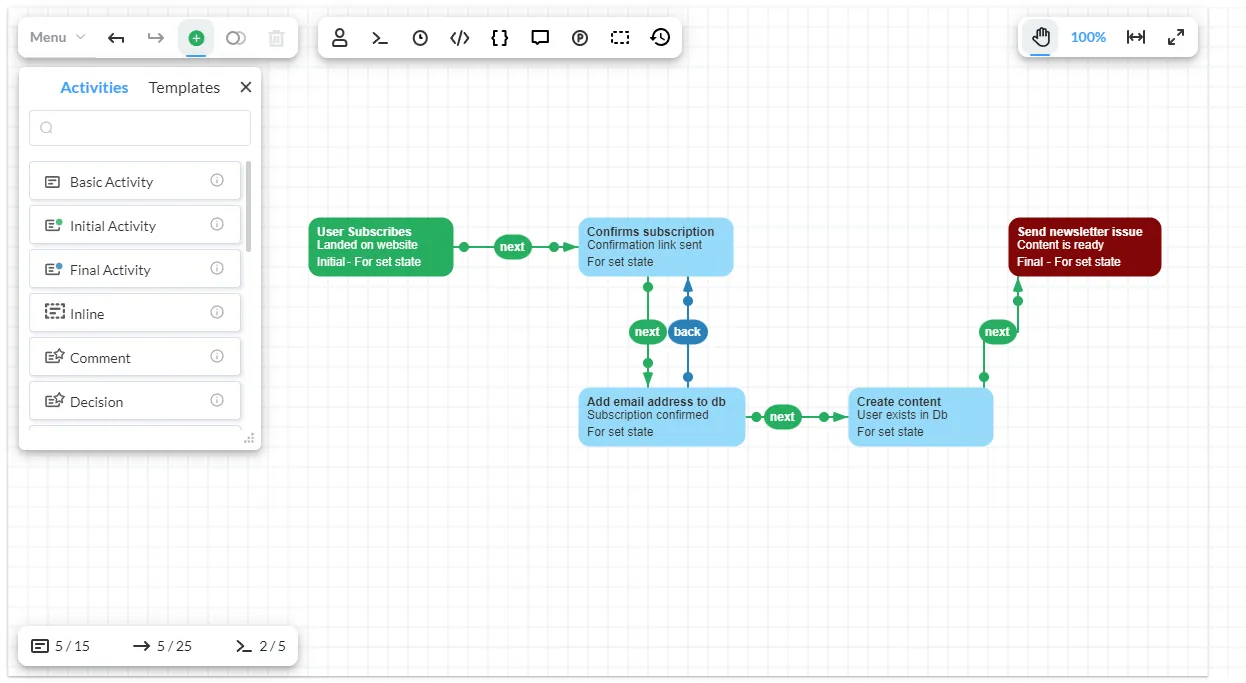
The complete workflow looks like this:
When creating transitions, you have the option to choose the type of transition ( direct and reverse ) that actually represents the direction in which the flow moves. What is important for us here is the Trigger , which will actually be the command I created - next. For reverses I have the back command. This is good if, for example, the user has not successfully verified the subscription, in that case we have to go back to the previous activity.
The complete workflow looks like this:
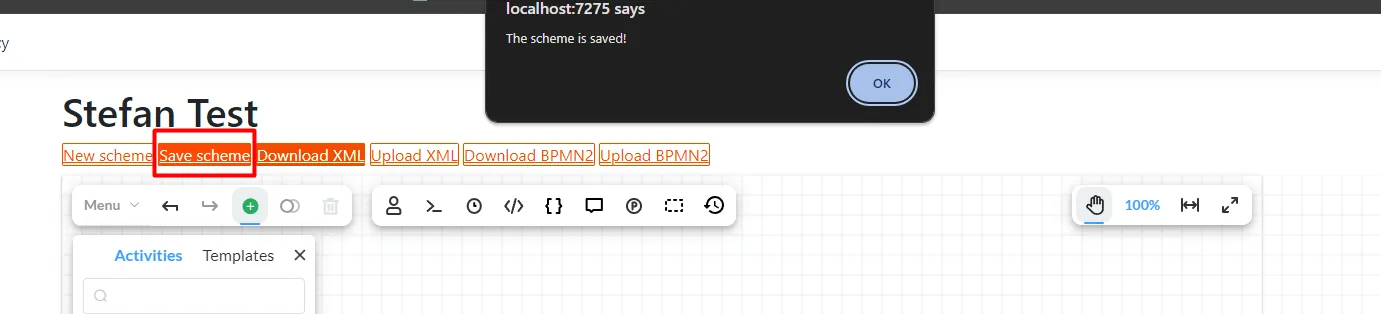
 Now we are given the option to record the session - which will actually record it in the database. After restarting the application, the seed will still be there because the runtime will fetch it from the database. We can also download in several formats.
Creating a process and calling commands
The goal of all this is to be able to create a custom application in which we will create through workflow activities and perform various actions on the occasion of them.
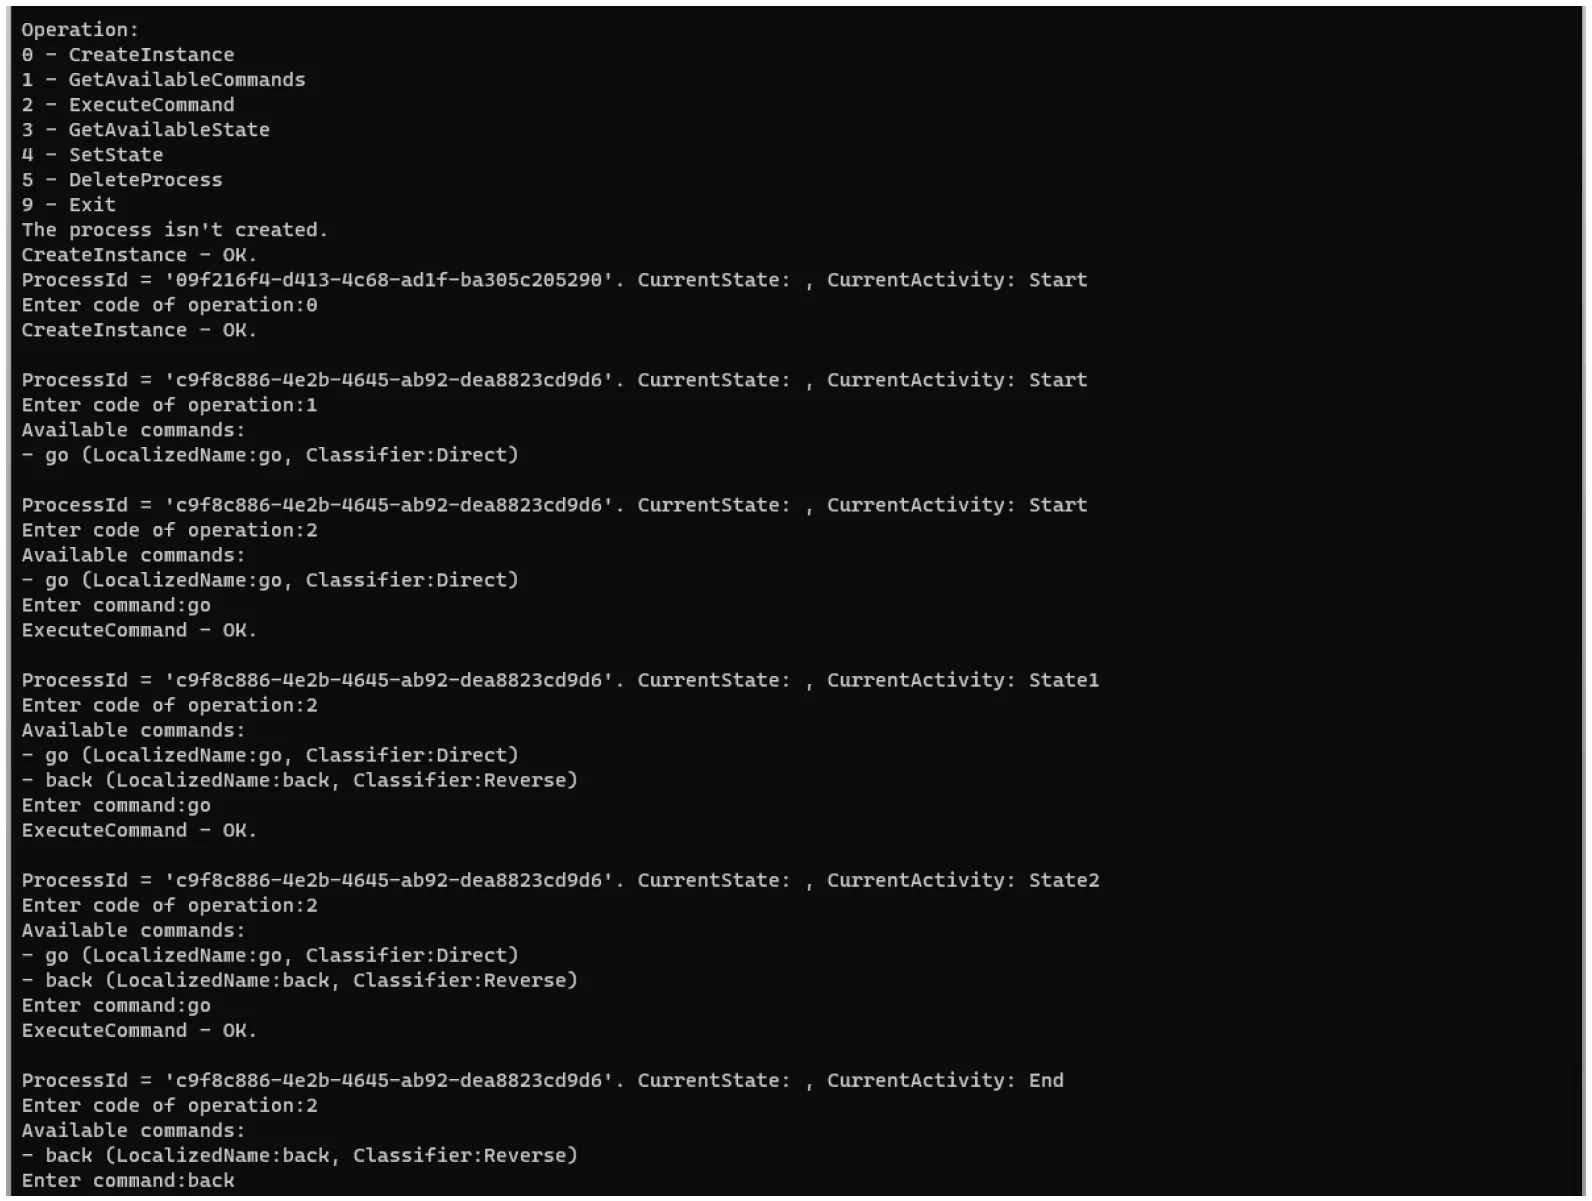
For this purpose, it is possible to create a console or web application. You can see an example of the application here.
Console application example from the url:
Conslusion
By using designer, I can make changes on the fly—like when I decide to change the look of the newsletter or how people receive it. It's like having a remote control for the newsletter process, so I can adjust things without getting my hands dirty with the complicated code. Plus, I won't have to spend time checking and rechecking the code for errors, because I won't be touching it. This makes updating things a whole lot simpler and less stressful. Optimajet Workflow Engine is one of the easiest workflow engines for document approval when integrating is required. We recommend it to companies that develop information systems with workflow functionality. In addition, you can download Optimajet samples here. If you have any question, please, do not hesitate to contact them. I can only agree with this and add that workflows also help us in our everyday life, without us even noticing it. How many times do we just make a plan and a path in our head, how we will do something today? That's all from me today.